Building Laptop-Friendly Places: a Location based app with GebetaMaps
Written by Kirubel Desalegn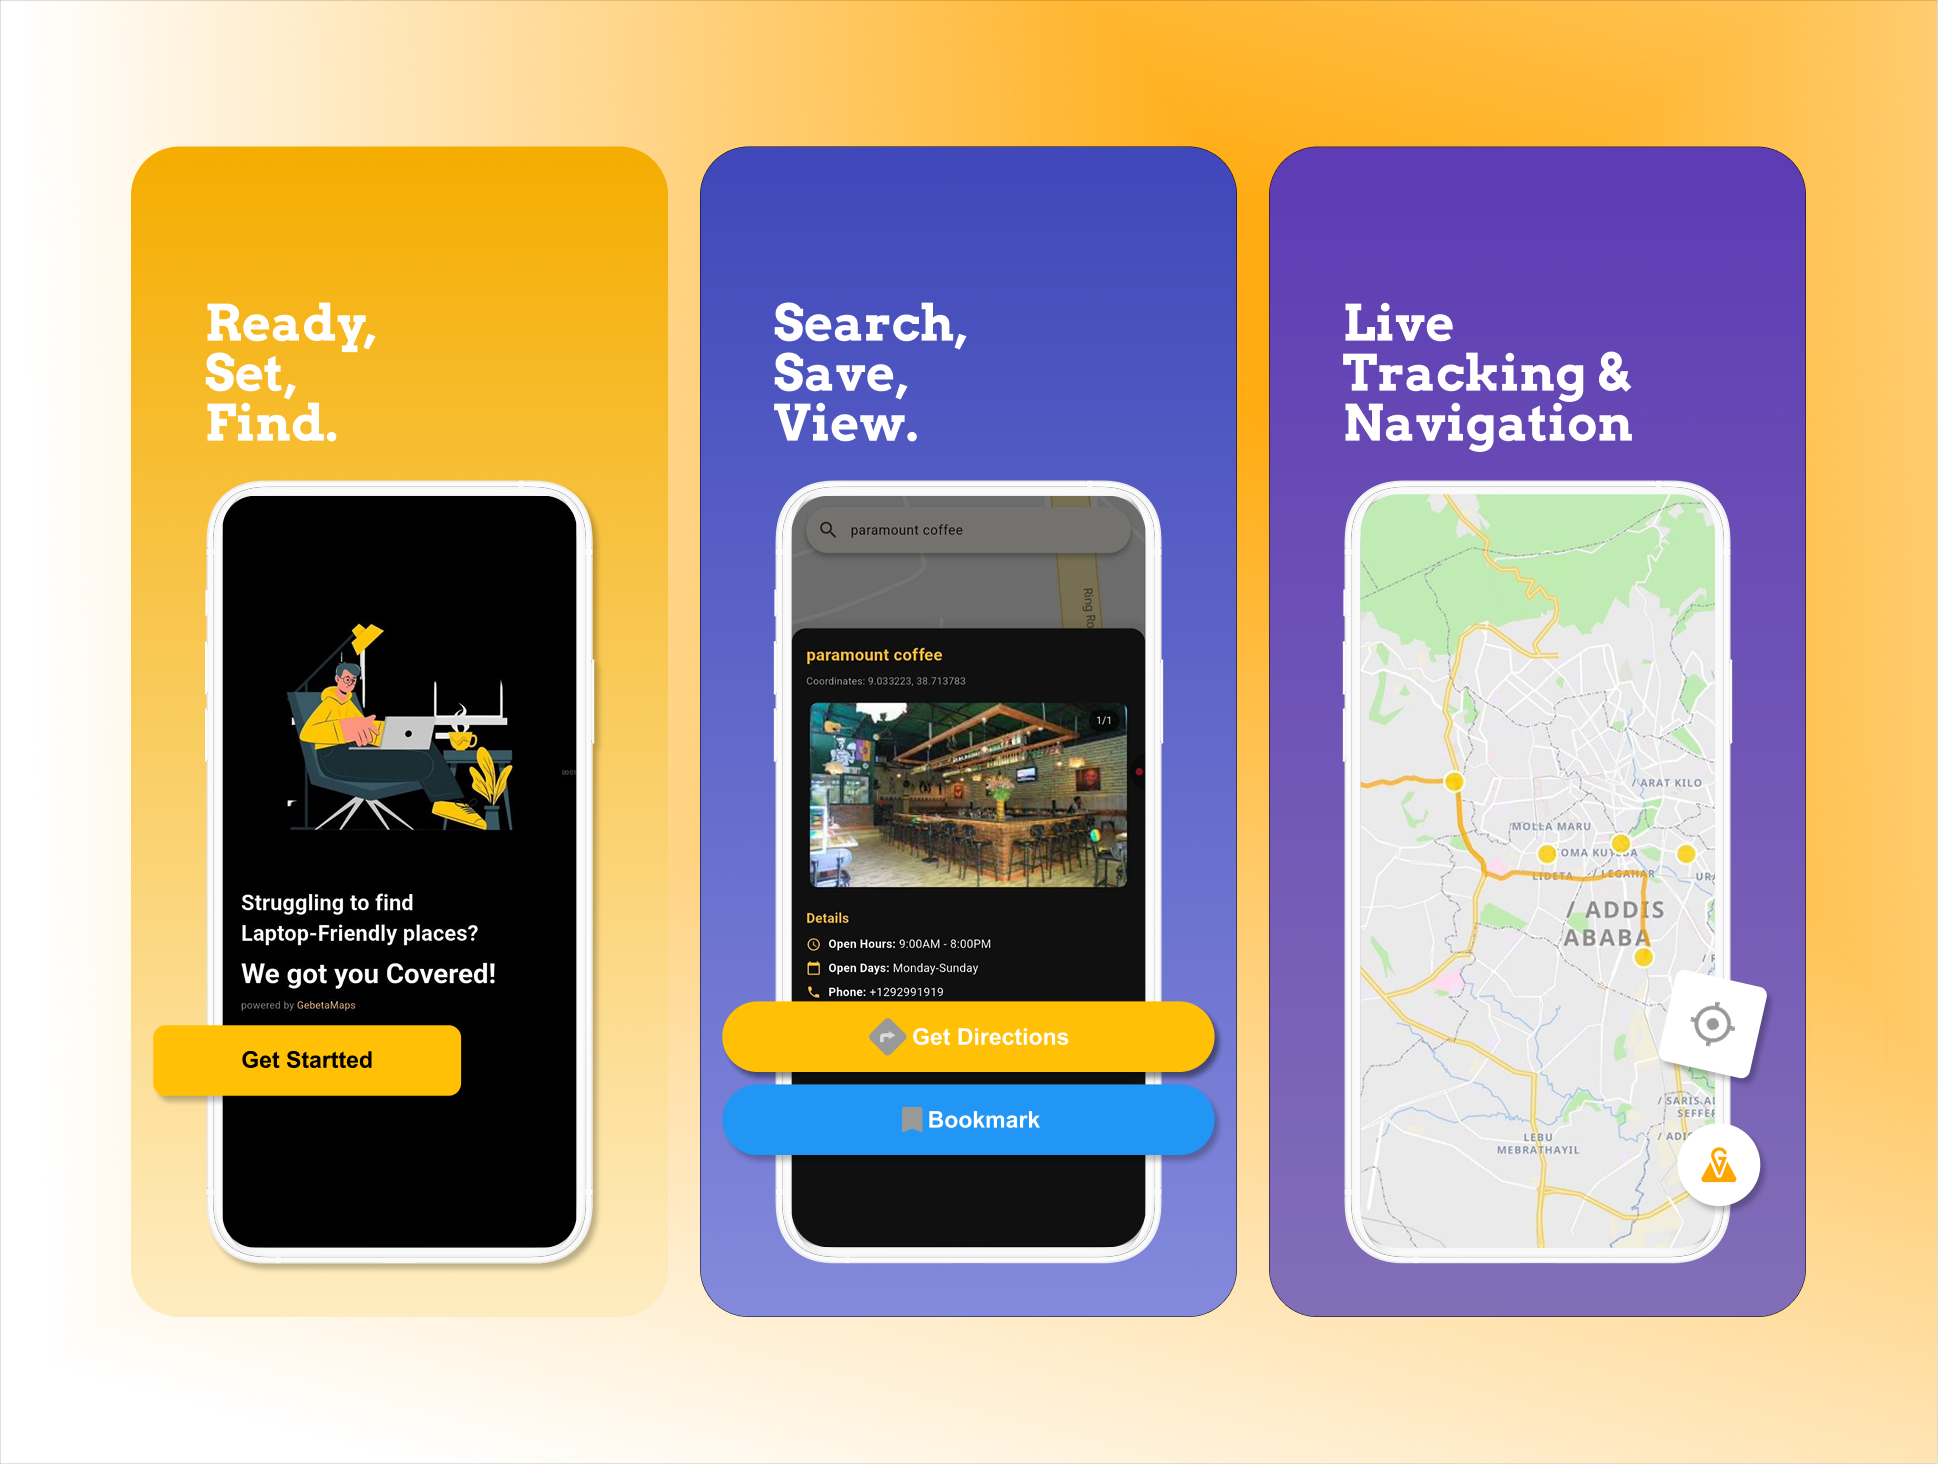
Gebeta Maps Tiles - Revolutionizing mapping for emerging markets
Building Laptop-Friendly Places: a Location based app with GebetaMaps
Introduction
In my internship at GebetaMaps, I was tasked with creating a Laptop Friendly Places finder app in Addis Ababa.so in this blog, I’ll walk you through my journey of building the app in flutter and fastApi, while integrating GebetaMaps directions api and tile services, and overcoming the challenges along the way.
Project Overview
As you can predict from the name, Laptop Friendly Places is an app made to help users find spots that are ideal for working on their laptops such as cafés and similar venues.It features a map display with route directions from the user’s location to a selected place, displaying the places images,open hours,days and other useful information.
Getting Started with GebetaMaps
First things first , get your GebetaMaps api key from https://gebeta.app/ . It’s recommended to use service account that they provide you for better security features. but for now, let’s just use the api key. To get the map running, lets first set up a simple stateful widget that manages the map’s lifecycle. And inside it, we call the api key we obtained from gebetamaps. And let's also initialize the GebetaMapController, which lets the app control actions like adding the places’ markers and drawing routes.
class _MapPageState extends State<MapPage> {
  late final String apiKey;
  GebetaMapController? mapController;

  @override
  void initState() {
    super.initState();
    apiKey = dotenv.env['GEBETA_API_KEY'] ?? '';
    _loadMapStyle();
    _determinePosition();
  }
}
The _loadMapStyle function handles how the map looks and the _determinePosition function which determines the user’s current location using geolocator.
Custom Map Styling
One of the advantages of GebetaMaps is its customizable styling. You can either get a local Json file or try to load from url using http. But for now let’s use the local light theme Json file.
Future<void> _loadMapStyle() async {
try {
  final style =
    await rootBundle.loadString('assets/styles/light_theme.json');
  setState(() {
    _mapStyle = style;
    _isLoadingMapStyle = false;
  });
} catch (e) {
  setState(() {
    _isLoadingMapStyle = false;
  });
  print('error loading style: $e');
}
}
Displaying the Map
To display the map, you must simply use the map tile documentation provided in their website. It should look something like this.
GebetaMap(
  styleString: _mapStyle!,
  apiKey: apiKey,
  myLocationEnabled: true,
  myLocationTrackingMode: MyLocationTrackingMode.tracking,
  onMapCreated: (controller) {
    mapController = controller;
  },
)
This widget handles rendering the map tiles, user location, and all overlays.
Implementing the Directions API
Once the map was running and locations could be displayed, the next step was making the app do something truly useful which is guiding the users from where they are to the laptop-friendly place they’ve chosen and that’s where the directions api comes in.
The directions api basically works like this: you give it two points(your starting position and where you want to go.). the api then returns detailed information about the route and the exact path drawn as a series of lat/long points.
Future<void> _getDirections(PlaceEntity place) async {
  final lat1 = _currentPosition!.latitude.toString();
  final lon1 = _currentPosition!.longitude.toString();
  final lat2 = place.latitude.toString();
  final lon2 = place.longitude.toString();

  String url = "https://mapapi.gebeta.app/api/route/direction/?origin={$lat1,$lon1}&destination={$lat2,$lon2}&apiKey=$apiKey";

  final response = await http.get(Uri.parse(url));

  if (response.statusCode == 200) {
    var data = json.decode(response.body);
    _drawRouteOnMap(data, place);
  }
}
Understanding the API response
when we call the directions api, GebetaMaps responds with an information about the route. It comes in json format which is basically a structured way of sending data that we can read. Here is a quick example of what it returns:
{
  "msg": "Ok",
  "timetaken": 51.905,
  "totalDistance": 15.715,
  "direction": [
    [9.18759536743164, 38.763946533203125],
    [9.187566757202148, 38.763954162597656],
    [9.1875581741333, 38.763362884521484]
  ]
}
These points are what we feed to the polyline drawing logic to create a route line on the map. And each coordinate we receive is used in it.
Fetching the places data from the backend
One of the features of the app is displaying a list of places directly in the map so that users select and interact with them.so to make this work , the app needs to retrieve the places data from the backend (I used fastAPI) and show them in the map. I used the http package to make a GET request to the endpoint.
Future<void> _fetchPlaces() async {
  if (_isLoadingPlaces || mapController == null) return;

  setState(() {
    _isLoadingPlaces = true;
    _placesError = '';
  });

  try {
    final places = await _dependencies.getPlacesUseCase();
    setState(() {
      _places = places;
    });

    _updateMapWithPlaces();

    setState(() {
      _isLoadingPlaces = false;
    });
  } catch (e) {
    setState(() {
      _placesError = 'Failed to fetch places: $e';
      _isLoadingPlaces = false;
    });
  }
}
Each place is represented by a placeEntity model which stores all the important information about the place like name, latitude,longitude, images, open hours,open days and phone. It ensures every place is consistently structured. Making it easy to display the markers on the map and showing details on the UI.
Biggest challenge I’ve faced
At first, my route drawing caused the tile to disappear leaving the page blank. After some debugging, I was able to find the error. And it was a simple one. I was parsing the coordinates in the wrong order. The api returns [latitude,longitude,] but I mistakenly swapped them.
WRONG
double lng = double.tryParse(point[0].toString()) ?? 0.0;
double lat = double.tryParse(point[1].toString()) ?? 0.0;
routeCoordinates.add(LatLng(lat, lng));
RIGHT
double lat = double.tryParse(point[0].toString()) ?? 0.0;
double lng = double.tryParse(point[1].toString()) ?? 0.0;
routeCoordinates.add(LatLng(lat, lng));
So this small fix immediately solved the blank tile issue and placed routes correctly.
Route Drawing Implementation
Once the directions api handed back all coordinates needed, the next step is to actually draw the route on the map. This is where another challenge might be faced. Some routes may have a lot of points and drawing them all at once might make the app laggy. Especially on low-end phones. So to solve this, I used segmented rendering method. So basically what it does is instead of trying to draw one single polyline, it breaks the route into smaller ones and draws them one after the other. And it’s implemented like:
void _drawPolylineRoute(List<LatLng> coordinates) {
  if (mapController == null) return;

  try {
    final lineOptions = LineOptions(
      geometry: coordinates,
      lineColor: "#FFA500",
      lineWidth: 4.0,
      lineOpacity: 0.7,
    );

    const int segmentSize = 20;

    if (coordinates.length <= segmentSize) {
      mapController!.addLine(lineOptions).then((line) {
        _routeLines.add(line);
      });
    } else {
      for (int i = 0; i < coordinates.length - 1; i += segmentSize) {
        final int endIdx = min(i + segmentSize, coordinates.length - 1);
        final segmentCoordinates = coordinates.sublist(i, endIdx + 1);

        if (segmentCoordinates.length >= 2) {
          Future.delayed(Duration(milliseconds: i * 5), () {
            if (mapController != null) {
              final segmentLineOptions = LineOptions(
                geometry: segmentCoordinates,
                lineColor: "#FFA500",
                lineWidth: 4.0,
                lineOpacity: 0.7,
              );

              mapController!.addLine(segmentLineOptions).then((line) {
                _routeLines.add(line);
              });
            }
          });
        }
      }
    }
  } catch (e) {
    print("Error drawing polyline route: $e");
  }
}
Better Security with Service Account
The last thing you want is for your api keys to get exposed. If someone tries to dig in your app, they could grab the key and abuse your account. Which could cause service problems and unexpected charges. To solve this issue, GebetaMaps actually provides a service account option. Which is much more secure way to authenticate. Instead of shipping a static api key inside the app, the service account approach looks like this:
Your server (or backend) stores the service account credentials, which include the client token and server token. .When your flutter app needs to interact with the GebetaMaps api, we make it so that it doesn’t use the api key directly. Instead, the app uses the GebetaMaps core package to authenticate through your backend. The backend verifies the request and uses the stored credentials to request authentication from GebetaMaps.
GebetaMaps then responds with an access token and a refresh token. The access token is what your app uses to make API requests. Since access tokens are short-lived, they automatically expire every few minutes.
Best Practices
One important lesson was to always test the endpoints before integrating them into the app. Using tools like postman makes it easier to catch issues early. I also learned focusing on small details matter inorder to avoid headaches :) . adding proper error handling was also a key takeaway from this project.
Release Link: https://github.com/kirubeldess/Laptop-Friendly-Places---Mobile/releases/tag/V1.0.0
Conclusion
Working with GebetaMaps api had a rewarding outcome. It simply provides better coverage for local locations and offered customization options. And I’d definitely recommend exploring this service.